We all know how frustrating it is when your headphone is not working or suddenly stops working in the middle of your favorite song, movie, or game.
But you don’t need to worry anymore as I will show you some easy, quick, and practical steps to not only find but fix it. So, let’s get started.
Check the Microphone Hardware
MUTED
If your headphone jack isn’t working on your headset, the first thing you can do is to make sure your headphone is not muted.
Many headsets have a button on them or a particular switch that can easily toggle to mute and unmute your mic.
Trust me, it will be quite sad if you found out that your mic was merely muted after spending hours changing settings, Uninstalling and Reinstalling drivers, and ruining your audio settings.
BROKEN
Before moving toward software solutions, make sure to check the microphone hardware and then test it.
You can even disconnect and then reconnect it to another available port if your microphone is in with a USB connection.
If your headphone comes with a 3mm microphone jack, disconnect and then reconnect the cable and make sure it is plugged into the microphone jack.
TESTING
If you want to test your headphones then manually,
1)Go to your sound settings by searching it in the start menu.

2) Scroll down until you see “test your microphone” left-click it.
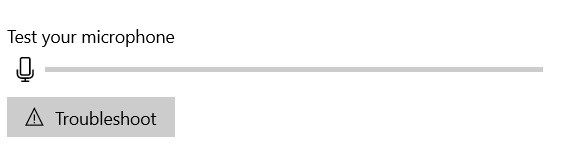
If your mic isn’t muted and still working, then proceed to the next steps.
Reinstall Audio Drivers or Update them
Method 1
Another way of resolving headphone jack not working on a laptop is to check device drivers; for that
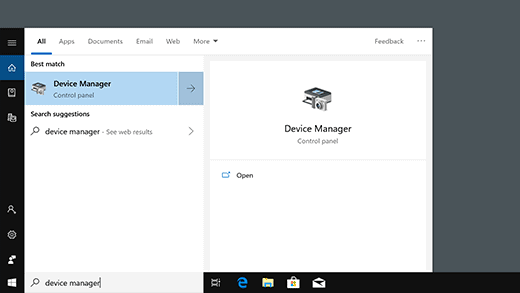
1)Open device manager by typing it in the search bar at the bottom right of your screen.
2) You will find an option named “sound video and game controllers,” expand it and click on the driver under it. Also, if you see more than one device driver, don’t be shocked as you can easily configure them separately.

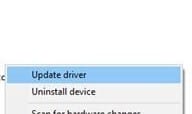
3) Select the audio driver and click on update driver. Windows would automatically search for the latest version and install it if available.
Method 2
1) Similarly, select your particular audio device and choose Update Driver.
2) Now select “browse my computer for driver software” and then choose from the list of available drivers,
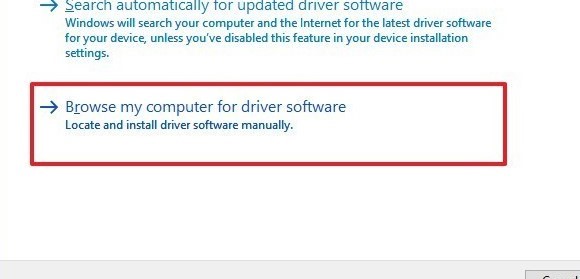
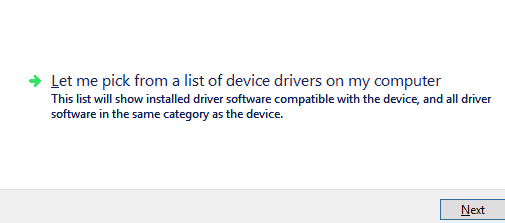
3) Select the high-definition audio device and press next.
4) A popup window will appear. Press “yes,” close the window, and restart your laptop or computer.
If that didn’t work, you could try reinstalling your driver. For this,
- Select your particular audio device and left-click “uninstall the device.”
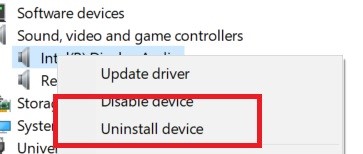
2) Click on “scan for hardware changes” present on the top right corner of the Device Manager window, which will detect and automatically install missing drivers. Now your sound drivers should be installed.
Method 3
If the problem continues, whatever device you’re having problems with like speakers, headset, or mic. I recommend downloading the driver software from your laptop or PC manufacturer’s website.
You can also download different third-party software for automatically detecting the missing drivers, in case audio, and installing them in a single click.
Also Read: Fix Antimalware Service Executable High CPU Usage
Check for Issues with IDT Audio device
IDT audio devices sometime tend to create issues with the sound driver, which ultimately lead to the audio jack not working for your system.
To uninstall it, follow these steps.
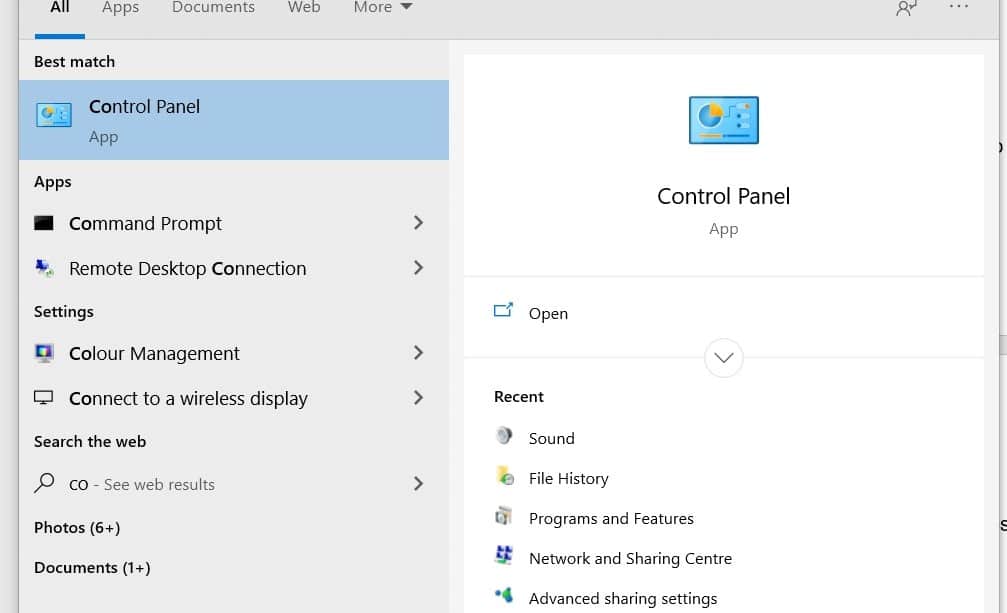
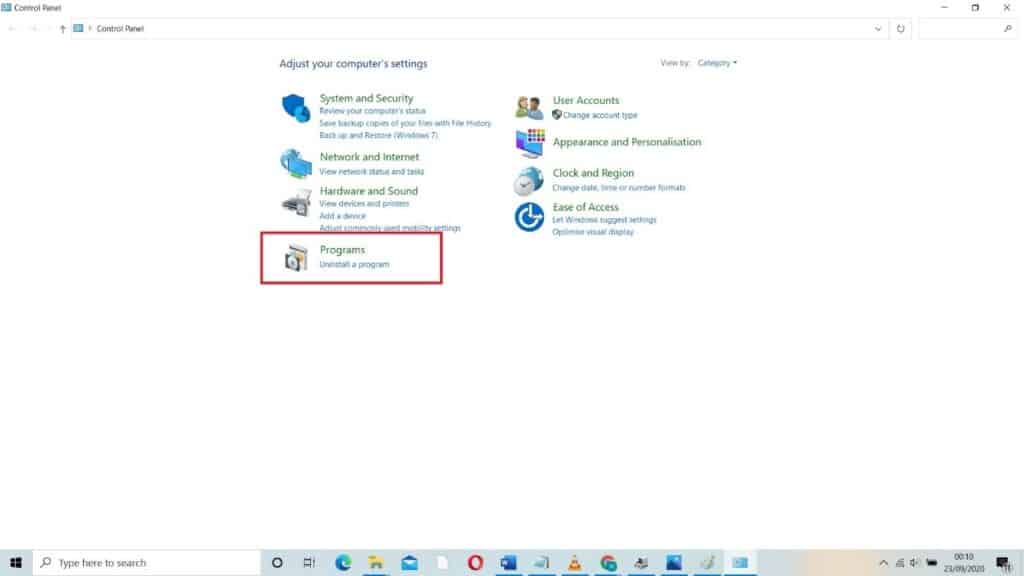
1)Find the control panel in your search bar and open it
2) Click on program and feature and locate IDT audio driver from the list of applications installed on your system and click it.
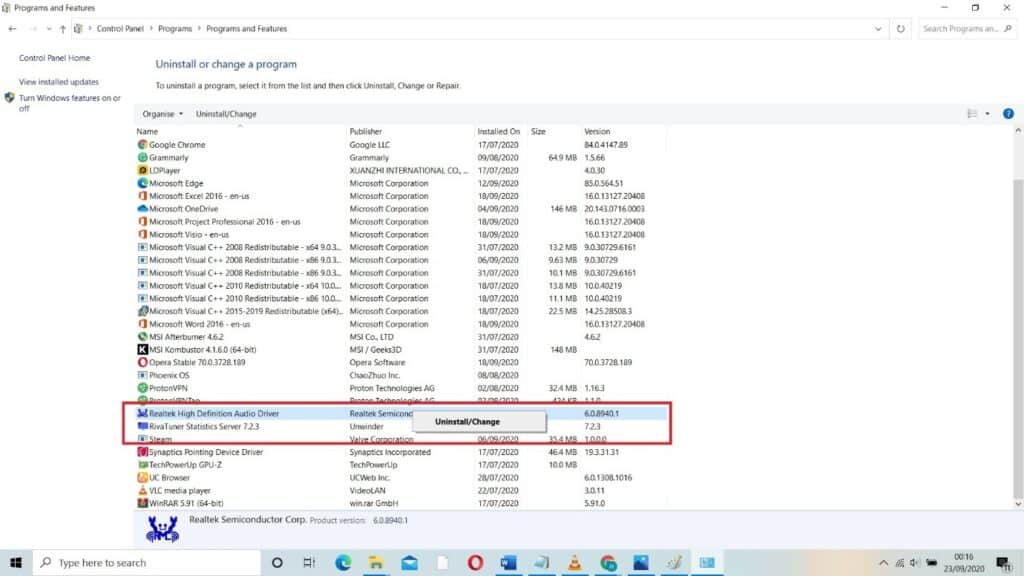
3) Select uninstall, and it will be removed.
4) Restart your computer and check your headphones; hope that will work.
Check the default format of the headphones
Method 1
There is another option that can be used to check for headphones not working on Windows 10.
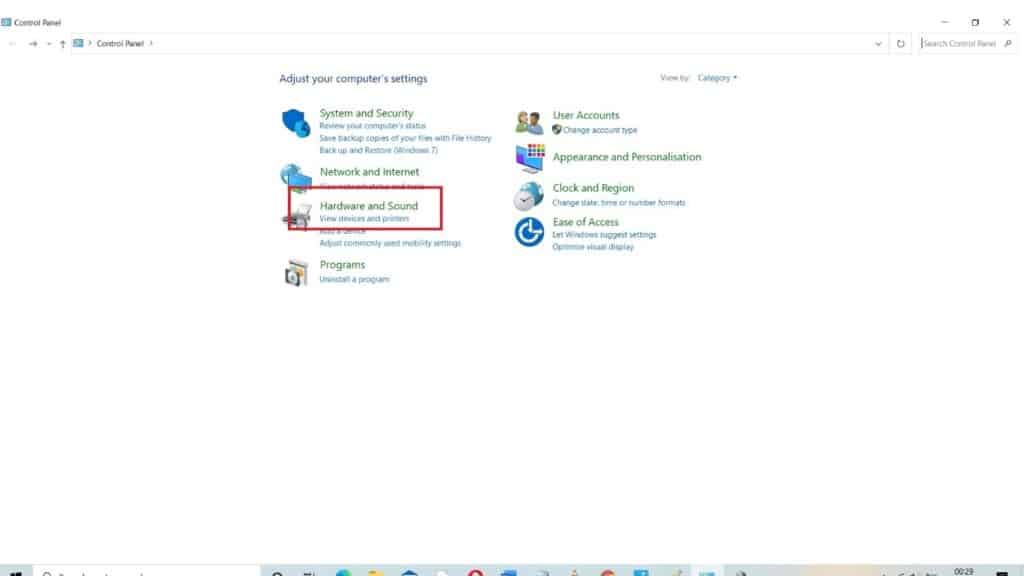
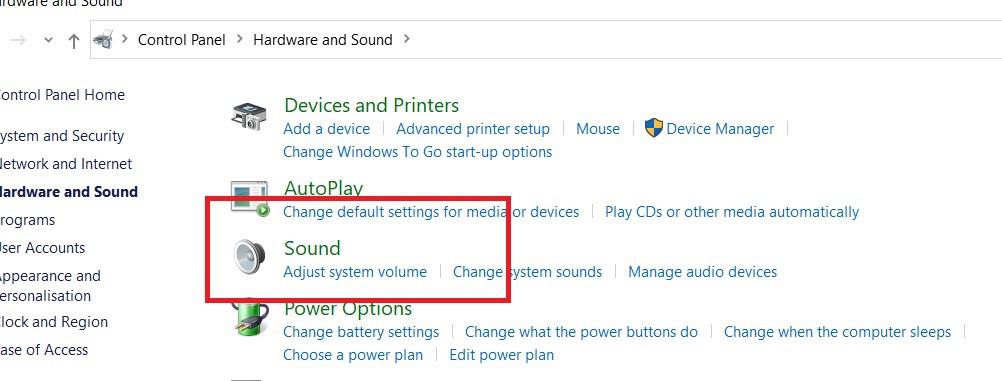
1)To do so, the type control panel in the search bar of the bottom right of your screen and open the control panel window.
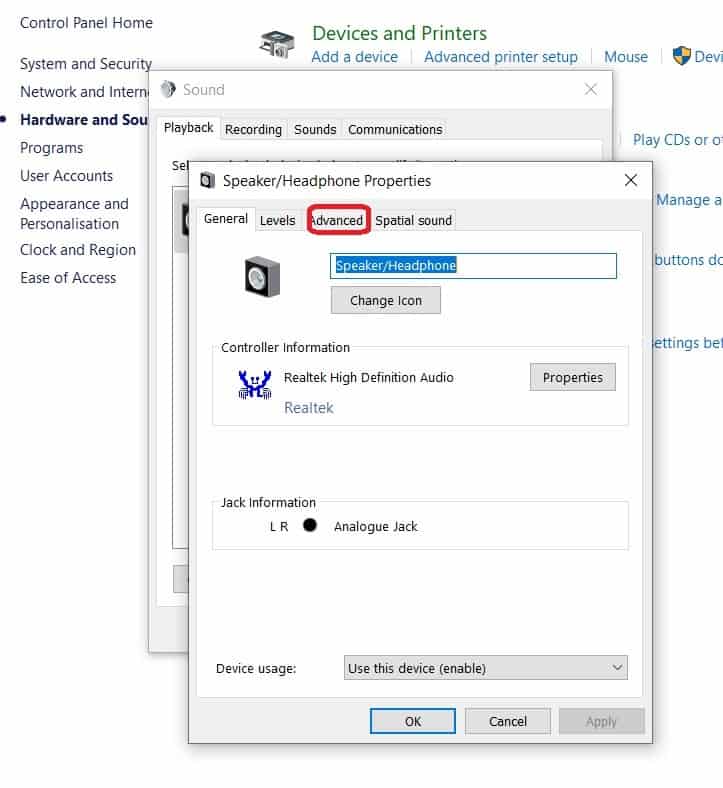
2) Click on sound than on the playback tab. Select your headphones icon; they should be listed as speakers only.
3) Click on properties and move to the Advanced tab.
4) Now, check the default format from the drop-down list and click on the test after every change.
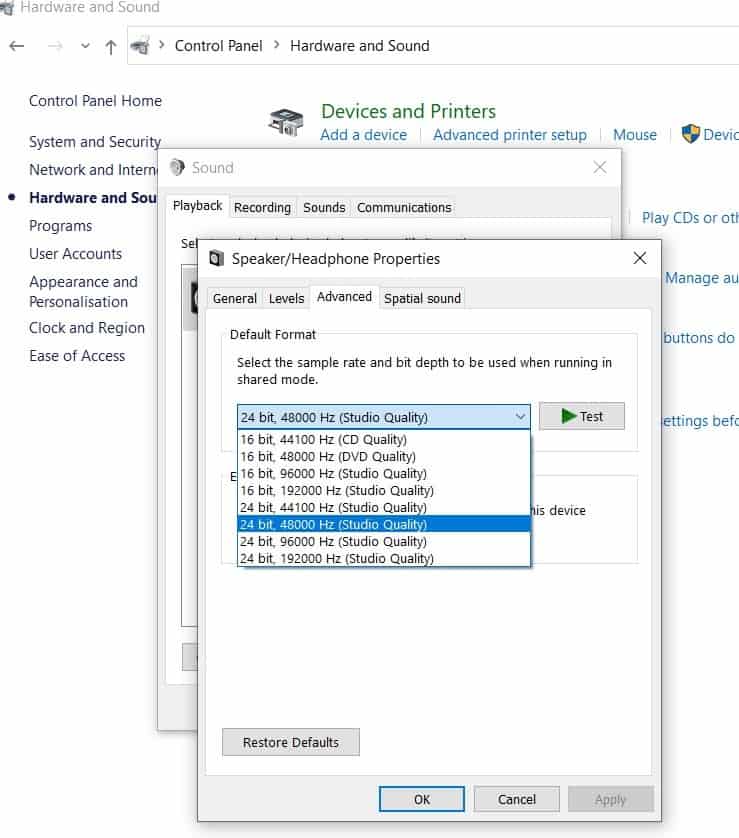
5) Select the one which enables you to hear the sound and click on apply
Method 2
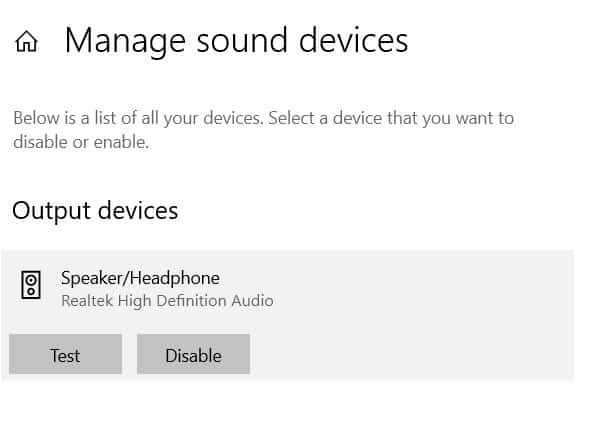
You can also check if the headphones are enabled on your computer and set as default.
1) Right-click on the volume icon on the taskbar and choose open sound settings
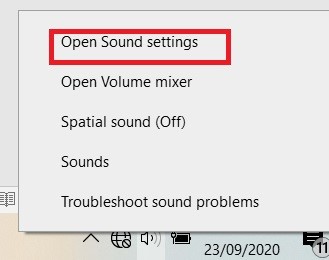
2) Click on manage sound devices and check if the headphones are not under the disabled list.
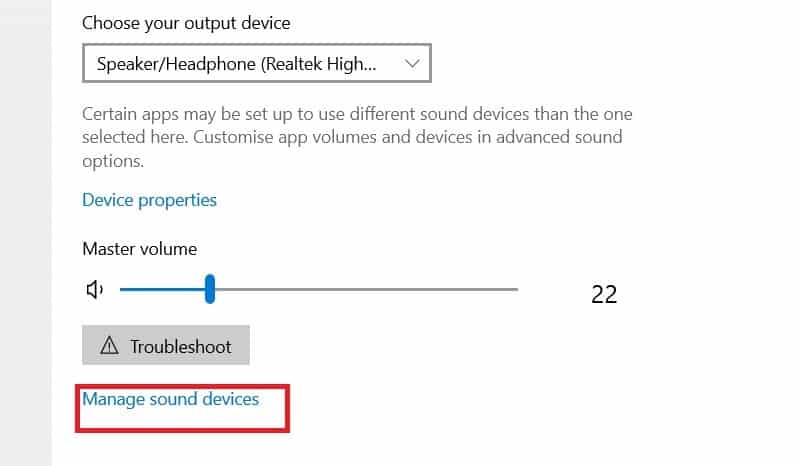
3) If so, then click it and select enable.
4) After that, choose your output device and select your headphones from the list to make it the default output device.
Reconsider Your Privacy settings
If you have done the above things and your mic is working in sounds but not the games you play or apps you use, it may be the windows privacy protection turned on. To resolve this.
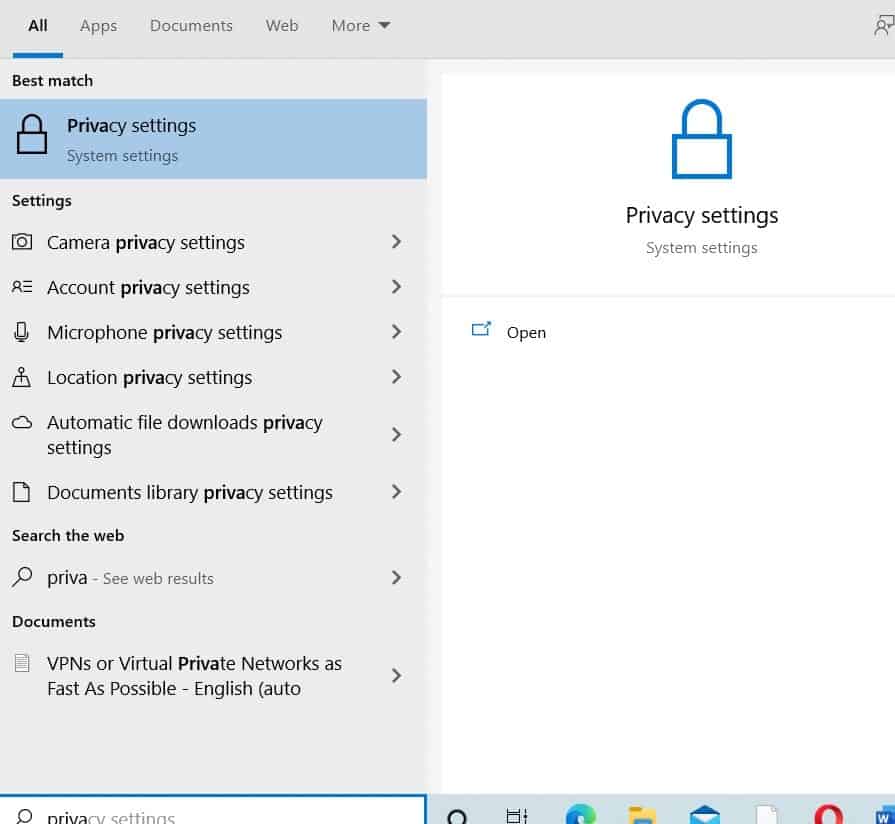
1)Tap your windows button or directly go to your start menu, search privacy settings, and left-click on it.
2) move to the “Microphone” option at the bottom right corner of your screen and select it.
3) If you see “Microphone access for this device is off,” then change it by clicking the “change” box below the microphone option.

4) Moreover, turn on “Allow apps to access your microphone” or even grant access to specific apps by making sure their bars are set to on.
Conclusions
After trying all of these above methods, if your headphone jack is still not working on a laptop or PC, then the headphone jack might be broken. Nevertheless, if somehow it works on another system, then I recommend visiting a computer professional.
Let me know in the comments if any of these methods worked for you!